Home » Use your Digital Certificate with Adobe Acrobat Reader DC
Use your Digital Certificate with Adobe Acrobat Reader DC
This page is available as a printer-friendly PDF document.
Incorporating your digital certificate into Adobe Acrobat Reader DC allows you to sign PDF documents that can be positively attributed to you, and those documents cannot be modified without invalidating the signature. The information in the digital certificate/signature can be verified with the issuing office (Information Security) or with the sender using digital fingerprints in the certificate.
These instructions assume you have already downloaded your certificate and installed it on your computer.
Open Adobe Acrobat Reader DC (“Reader”).
Click “Edit” on the toolbar at the top of the Reader window (Fig. 1).
Fig. 1
Select “Preferences…” at the bottom of the pulldown menu (Fig. 2).
Fig. 2
In the “Preferences” window, select “Signatures” in the left-hand menu bar (Fig. 3).
Fig. 3
In the “Identities & Trusted Certificates” section, click the “More…” button (Fig. 4).
Fig. 4
In the “Digital ID and Trusted Certificate Settings” window, ensure your certificate is listed (Fig. 5).
Fig. 5
Click on the certificate to display its attributes (Fig. 6); it must display the following elements:
Your name as you requested it be displayed
“The University of Texas Health Science Center at San Antonio”
“Issued by: University of Texas Health Science Center at San Antonio RSA CA The University of Texas Health Science Center at San Antonio”
“Valid from:” the date you downloaded the certificate
“Valid to:” the expiration date of the certificate
Fig. 6
Once you have validated the information above, click the down arrow on the pencil icon in the toolbar above the certificate list (Fig. 7).
Fig. 7
From the pencil’s pulldown menu, click on “Use for Signing” (Fig. 8).
Fig. 8
A pencil icon will appear to the left of your entry in the certificate list (Fig. 9). You can now use this certificate to sign PDF documents.
Fig. 9
You can now close the “Digital ID and Trusted Certificate Settings” and “Preferences” windows. Your certificate is now ready to sign documents.
Customizing Your Signature
When signing a PDF document with your digital certificate, the standard format is acceptable to most for their needs. Fig. 10 shows how the standard format looks, complete with the display name, basic identifying information, and the Adobe logo. Detailed information about the certificate and the signer are available by clicking on the certificate.
Fig. 10
You can customize your signature to make it fit your personal desires, going from minimal information (Fig. 11) …
Fig. 11
… to incorporating your written signature (Fig. 12).
Fig. 12
The name or signature and the detailed information will resize automatically based on the size of the signature block.
To customize your signature, take the following steps:
Open Adobe Acrobat Reader DC (“Reader”).
Click “Edit” on the toolbar at the top of the Reader window (Fig. 13).
Fig. 13
Select “Preferences…” at the bottom of the pulldown menu (Fig. 14).
Fig. 14
In the “Preferences” window, select “Signatures” in the left-hand menu bar (Fig. 15).
Fig. 15
In the “Creation & Appearance” section, click the “More…” button (Fig. 16).
Fig. 16
The default “Creation” settings for the “Creation and Appearance Preferences” window are acceptable; in the “Appearances” box, click the “New…” button (Fig. 17).
Fig. 17
The “Configure Signature Appearance” window (Fig. 18) is where you will design your signature’s appearance; you will return to this window for each customized signature. It is composed of:
A title for you signature you can later select from a list
A preview of your customized signature
Whether the signature includes a graphic, your name in large text, or simply text information about the user
The text elements to be displayed in the customized signature
The properties of the displayed text
Fig. 18
For a basic signature, similar to Fig. 11:
Type a title for this signature (for instance, “Basic”) (Fig. 18-A).
Under “Configure Graphic”, select “Name” (Fig. 18-C).
Use the rest of the default settings shown in Fig. 18 above (D and E).
Click the “OK” button each time to close the “Configure Signature Appearance” window, the “Creation and Appearance Preferences” window, and the “Preferences” window.
To include a written signature, similar to Fig. 12:
You must have a PDF of your written signature. You can use a smartphone camera or a scanner to capture a picture of your signature, and then convert it to a PDF with a graphics tool. Since this is an advanced feature, please contact your technical support or IT partner for help.
Open the “Configure Signature Appearance” window using the previous steps.
Type a title for this signature (for instance, “Written signature”) [See Fig. 18-A above].
Under “Configure Graphic”, select “Imported graphic” [See Fig. 18-C above].
Click the “File…” button, browse to where you stored the PDF of your written signature, and select it. The “Preview” for your digital signature will change to show your imported graphic [See Fig. 18-B above].
Leave the rest of the default settings for “Configure Text” (D) and “Text Properties” (E) shown in Fig. 18 above.
Click the “OK” button each time to close the “Configure Signature Appearance” window, the “Creation and Appearance Preferences” window, and the “Preferences” window.
You can also use a picture instead of a signature to customize your certificate’s appearance.
Like the written signature, the picture must be a PDF document. You can use a smartphone camera or a scanner to capture a picture you want, or use a stock photograph, and then convert it to a PDF with a graphics tool. Since this is an advanced feature, please contact your technical support or IT partner for help.
Open the “Configure Signature Appearance” window using the previous steps.
Type a title for this signature (for instance, “Picture”) [See Fig. 18-A above].
Under “Configure Graphic”, select “Imported graphic” [See Fig. 18-C above].
Click the “File…” button, browse to where you stored the PDF of your desired picture, and select it. The “Preview” for your certificate with the picture will change to show your imported graphic [See Fig. 18-B above].
Leave the rest of the default settings for “Configure Text” (D) and “Text Properties” (E) shown in Fig. 18 above.
Click the “OK” button each time to close the “Configure Signature Appearance” window, the “Creation and Appearance Preferences” window, and the “Preferences” window.
Now when you select “Picture” for your signature title, signed documents will look like the example in Fig. 19.
Fig. 19
Again, the graphic and the detailed information will resize automatically based on the size of the signature block.
Now, each time you sign a document with Adobe Acrobat Reader DC (see the section “Signing a PDF”), you can select which signature format to use.
Signing a PDF
Signing a PDF document with Reader can take two approaches:
The document has a signature block already in place
There’s no signature block and you create your own
The steps are described separately below.
Signing an existing signature block/box
Documents with existing signature blocks are usually standardized forms or some other type of formal documentation. The signature block will usually appear as a blue box on the form with a small orange “Sign here” flag. See Fig. 20.
Fig. 20
To fill the signature block, take the following steps.
Scroll the document to the signature block (Fig. 20).
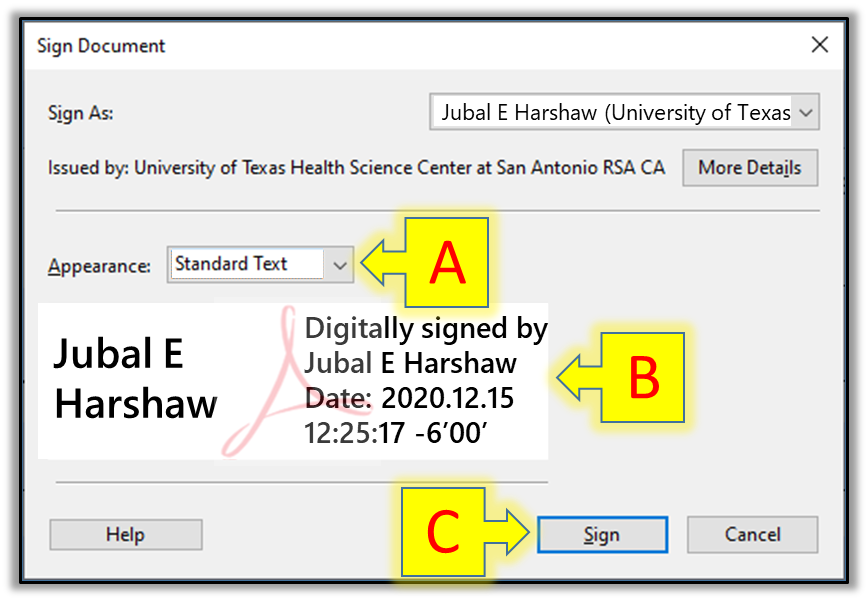
Click once in the blue area of the signature block; the “Sign Document” window will open (Fig. 21), with the default setting of “Appearance: Standard Text” (Fig. 21-A). “Standard Text” includes the display name and the date and time the document will be signed (Fig. 21-B).
Fig. 21
If this appearance is acceptable, press the “Sign” button (Fig. 21-C).
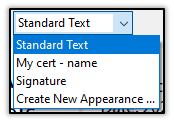
If you wish to use a custom appearance you set up in the section “Customizing Your Signature”, click the down arrow next to “Appearance:” (Fig. 21-A) to display any of your custom signatures (Fig. 22).
Fig. 22
You will be required to save the signed document, either with the existing file name or as a new file name. Once the new file is saved, the signature is incorporated into the document.
Creating your own signature block
If you receive a document that requires a signature, but a signature block hasn’t been provided, Adobe Acrobat Reader allows you to draw one of your own.
Open the PDF document in Reader and scroll down to where you want to insert a signature block.
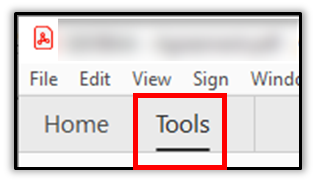
Click on “Tools” below the “View” and “Sign” menu items in the upper-left-hand corner (Fig. 23).
Fig. 23
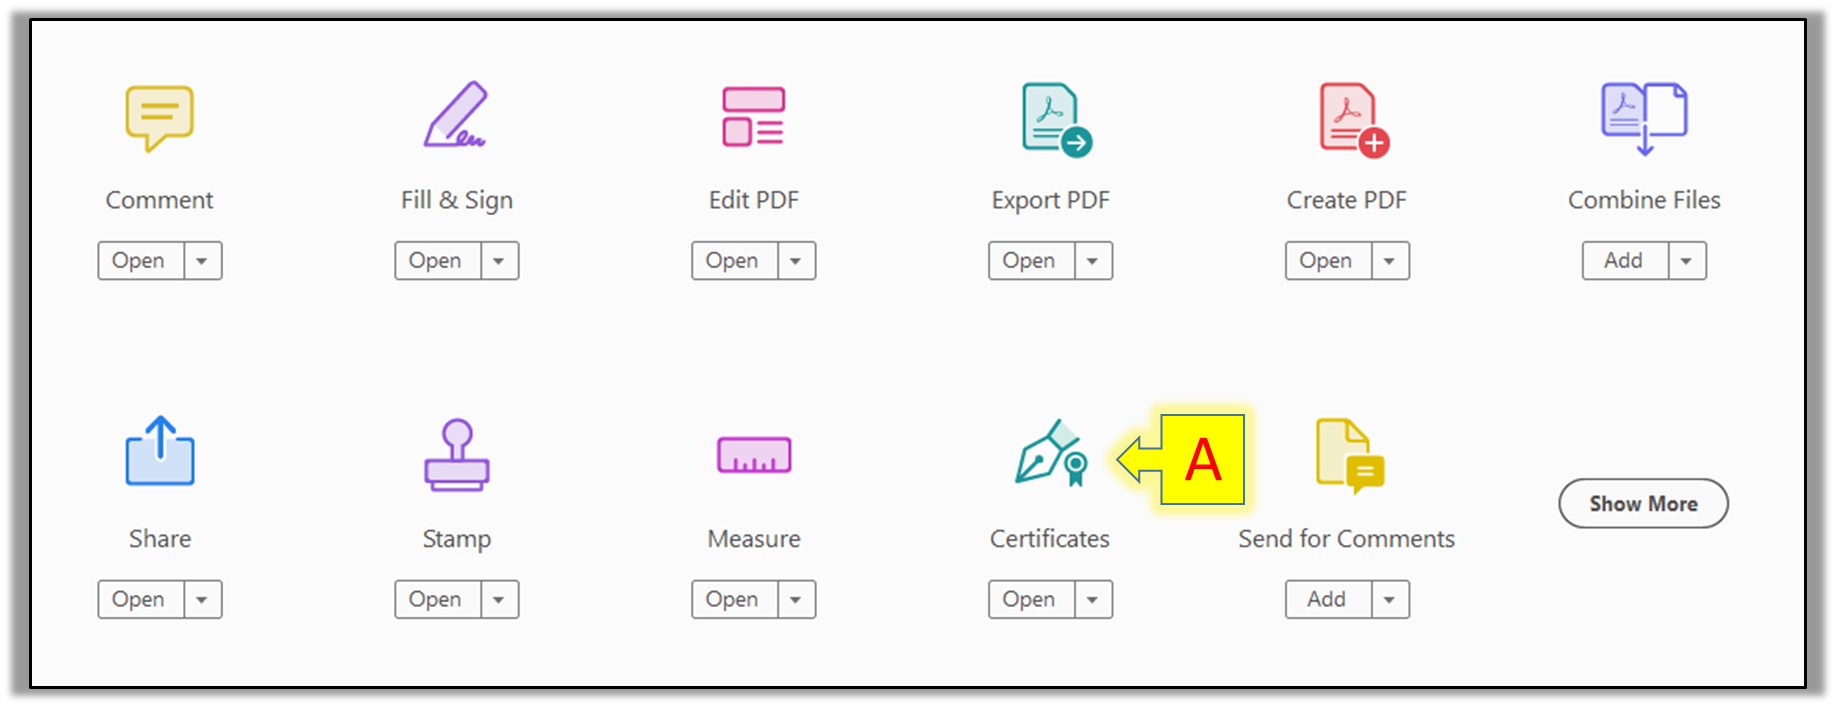
The “Tools” menu items will open (Fig. 24).
Fig. 24
Click the “Certificates” icon (Fig. 24-A). The “Tools” menu items will close and the “Certificates” toolbar will appear over the open document (Fig. 25).
Fig. 25
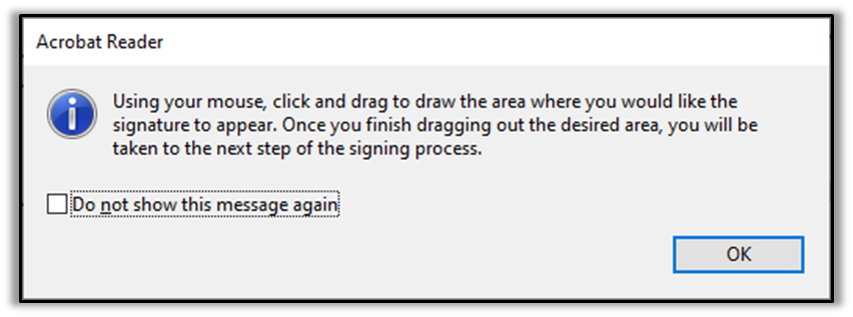
Click the “Digitally Sign” icon (Fig. 25-A). A notice box will open instructing you to use your mouse to draw a box where you’d like your signature to appear (Fig. 26).
Fig. 26
After reading, click “OK” to close the notice box. The mouse pointer will change to crosshairs (Fig. 27, enlarged, and without the surrounding box).
Fig. 27
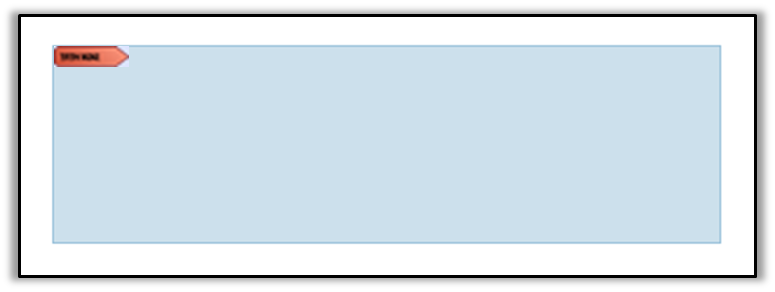
Position the pointer where you want the upper-left-hand corner of the signature box to appear. Click and hold the mouse button and drag the mouse to the lower-right-hand corner of the desired signature box. A blue signature box will follow the mouse movement (Fig. 28).
Fig. 28
When the signature box is the desired size, release the mouse button. The mouse cursor will return to normal and the signature box will lock in place and have the orange “sign here” flag (Fig. 29). If not positioned or sized as you would like, simply delete it and try again.
Fig. 29
You will then follow the steps for signing/filling an existing signature box (Steps 24 through 26 above).
You will be required to save the signed document, either with the existing file name or as a new file name. Once the new file is saved, the signature is incorporated into the document.